
How to Upgrade Old Desktop PC: My DIY Custom Build Computer
How did I upgrade my 10 year old desktop PC with new computer parts and accessories to make it blazing fast is what you learn in this DIY custom build tutorial. I own Dell XPS 8300 desktop which I purchased online over a decade ago and over the years I have gradually upgraded it with new PC parts which have enabled me to consistently use this old computer as my primary blogging and video editing equipment.
If you look at the specifications of the Dell XPS 8300 desktop you will find that it was a powerful computer with superior performance way back a decade ago. It has a second generation Intel i5 processor, which seems pretty outdated to handle the current processing power required by windows applications, but you will be surprised to know that if you upgrade your PC parts using new more powerful accessories then even these old computers can demonstrate high computing performance.

Of course you might argue that a slow processor will always be a limiting factor but then changing the motherboard or processor is a huge task and might as well buy a new computer itself. But we did some cheap PC upgrades, which work much less expensive than buying a new computer itself.
This post shows how I upgraded my PC at low cost, its limitations and the performance boost of my desktop PC. Some of these parts might not be suitable for your particular computer which you want to upgrade but it will give you an idea about basics.
Switch to SSD Drives / M2 NVMe Drives
If there is one PC part which you can replace and which will dramatically improve your computer performance, that is the hard disk. The solid state drive or SSD is an excellent replacement for your old moving parts hard disk drive. These new SSDs are much faster and make your PC much more agile and responsive than ever before.
I replaced my hard disk two times over the years, first with the 256GB Samsung 860 Evo SSD few years back and more recently I have upgraded it to the 2 TB Samsung 870 Evo which has made this desktop even more blazing fast. If you need more storage space then you can upgrade to the 4TB Samsung EVO 870 available in some countries as well, but that will be more expensive. Samsung SSDs are the best in performance in the market.
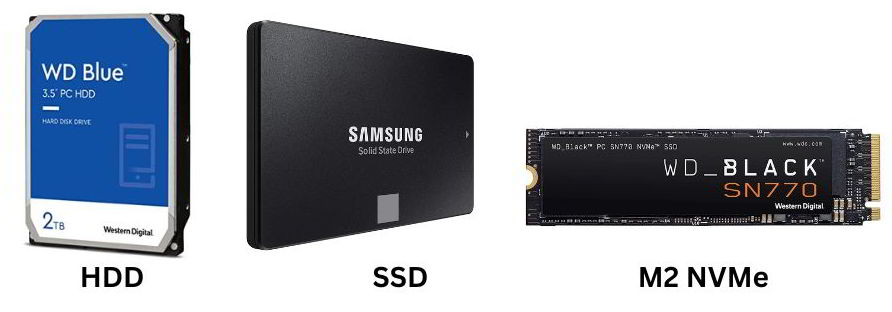
Of course NVMe drives would have been the best option, but our custom Dell motherboard did not support these and therefore SSD had to be used. If your computer motherboard has M2 slots, it is preferable to add M2 NVMe drives which are much much faster. I would have got the Samsung 980 Pro Gen 4 NVMe as my first choice.
Other good choices would be the WD Black SN770 and Crucial P5 NAND M2. But you have to also explore the cooling solutions as these drives tend to get very hot and now many come with built in heat sinks.
Upgrade Graphic Cards
The original computer configuration came loaded with a basic graphic card. We upgraded this graphic card to a more powerful Gigabyte GeForce GT 1030 with 2GB RAM which greatly enhanced the graphic processing power of this computer and allowed us to do many more graphic intensive tasks like video editing for our YouTube channel. I think this GPU works very well without needing too much power supply and provides optimal video processing power.
Increase RAM
While 8GB RAM has become a basic standard for any computer on the Windows 10 platform, if you do engage in video editing and lot of image processing tasks, then it is preferable to to upgrade to 16GB RAM so that in combination with the GPU, many of these processor intensive tasks can be performed well.
This computer came preloaded with 4GB RAM, and we upgraded over the years to 16GB. While upgrading RAM always remember to find all the details of the recommended RAM and it is always preferable to buy the same speed RAM (1333MHz DDR3 in our case) so that there are no conflicting errors while your PC loads.
An incompatible RAM stick can prevent your computer from starting! Check how many RAM slots are there on your computer, and you can use all of them. but it is also important to check how much maximum RAM your motherboard can support. I checked up the owner’s manual and found that our computer could support max up to 16GB, with 4GB in each slot, so we upgraded to 16GB.

If your computer supports faster RAM, the best RAM kit to start would be the Corsair Vengeance 16GB DDR4 3200Mhz (8GBx2 – use dual channel support) and you can try higher frequency as well if your PC motherboard supports it.
Upgrade to Gigabit LAN
As we continue to upgrade to gigabit LAN speeds of 1Gbps, old computer network cards might not support that kind of speed, and typically they would support 100 mbps.
Since our PC had separate extra empty PCI-E slots available on the motherboard, I installed the TP-Link gigabit LAN network card, which supported speeds up to 1 Gbps and now we were able to utilize the optimal speeds of an gigabit internet service provider and get value for that money using a high speed LAN connection. I also upgraded to a Cat 6 network cable, which is essential to get these speeds.
If you have a newer motherboard, and intend to use a 10GBps high speed broadband connection in countries like US, then this TP-Link 10GBps Network Card will be a future proof option.
Support High Speed Wifi
There was a built in Wi-Fi card in the motherboard when we got this new computer, but it stopped working for some reason. So we also installed the TP-Link AC600 Wi-Fi Adapter which allowed the computer to also get high wifi speeds. This was a simple plug and play device and give excellent Wi-Fi speed over 100 mbps.
If you prefer a more compact version which is plug and play, you can grab the TP-Link AC1300 Nano USB Wifi Adapter as well.
Add Bluetooth Support
My desktop had no Bluetooth support. I also installed the TPLink Bluetooth 5.0 adapter to be able to connect via Bluetooth to our mobile phone and laptop easily. This was a simple plug and play device and worked very well connecting to Bluetooth 5.0. Easily transfer data, image and videos over bluetooth.
Add USB 3 Ports
USB 3.0 and USB 3.1/3.2 are the standard USB ports available on computers nowadays allowing superior data transfer speeds. This computer came preloaded with USB 2.0 ports and I used the PCI-E slots on the motherboard to install a super cheap USB 3.0 internal card, it provided us 2 USB 23.0 ports at the back side of the computer. Very essential to get the USB 3 fast transfer speeds with my new external drives – Sandisk Portable SSD and Sandisk USB C Dual drive.
If you need a more powerful version with multiple USB 3.0 ports and USB C ports as well, you can try this USB 3/USB C PCI expansion card which will give your old PC 5 new USB 3.0 ports and 2 USB C ports.
Add Multiple Extra Hard Disks/SSD
I also enabled and option to increase my hard disk capacity by installing a Seagate Barracuda 4TB hard disk which became very useful for secondary storage as SSD storage costs are still high. SSD was set up for the Windows operating system which allowed for super quick Windows startup and also used for C: Drive for running all Windows applications so that they all opened quickly in a jiffy. This hard disk of high storage capacity came very cheap and we used it to host extra folders with huge file sizes like videos, image library and other assets for the website which occupy a lot of storage space.
Of course it is slower than a SSD, but does the job and has higher storage for much less price. If you want you can replace it with another SSD as well. instead of the HDD. We used the 5400rpm hard disk drive, but you can choose to install the 7200rpm hard disk drive (like the Seagate Firecuda HDD) which will be much faster and reliable. Based on the power supply of the computer, we did not want to overload it and add more hard drives. To add this hard drive I did use a Sata splitter connector which was very useful to add an extra power supply port.
Upgrade Power Unit
My computer power unit was also repeatedly giving trouble and had heating issues due to which I needed to replace the power supply as well. It was previously repaired a few years back and I really needed to put in an excellent power supply so that all the new better computer components could work with optimal performance without any power issues. The Corsair 450W power supply was the best choice for my purpose (some DIY PC builders prefer the modular power supply). If you intend to put more PC components they can be power intensive and you will need higher wattage power supply unit to power them.

New AV Accessories
- Blue Yeti Microphone is the best microphone out there which captures cardioid, omnidirectional and bidirectional audio in the highest quality possible.
- Logitech Brio 4K webcam is the sharpest and most versatile web camera out there with noise cancelling microphone and built as well an adjustable fields of view.
Dual 27 Inches 4K Monitors
I purchased two LG 27 inch 4K IPS monitors to create a dual monitor setup for increasing productivity. I did lot of research to find out that my new GeForce GT 1030 graphic card supported two 4K monitors – one through the HDMI port and other through the displayport.
It is a pleasure to view 4K resolution as all the icons, text and graphics appear crystal clear ans super sharp on screen. Watching YouTube premium in 4K is an outstanding experience by itself. It can also double as a television and I use my Amazon 4K Fire Stick to watch YouTube and Netflix on it. It is also an excellent experience to do video editing on larger screen as well as use apps which can now be run side by side as well as in the split screen mode.
Upgrade to Windows 11
Our computer originally came with Windows 8, and we got a free upgrade to Windows 10 when it was available and we were able to upgrade to the latest versions of Windows 10. Unfortunately due to the new requirements of Windows 11, this particular computer cannot upgrade to Windows 11 due to the requirement of the windows security chip.
Since we installed a new SSD, we decided to do a clean Windows 10 Install by downloading Windows 10 media from the Microsoft website for free. If you have a newer computer, chances are it might have already upgraded to Windows 11 as a free Window upgrade, if it is already supported.
NOTE: Please note that we did all these custom PC upgrades by learning through books and other YouTube videos and were able to easily install these PC parts ourselves. It is important to do proper grounding as static electricity might short electrical parts and make your PC and unusable. It is always recommended to seek professional help from trained computer engineers to upgrade your PC
Disclaimer- Some of these links are Amazon affiliate links, which means we earn a small commission when you actually buy the product, and it helps to support this website.