In this tutorial, I’m going to show you how to build an impressive web application, including a sample to work with as we go along. I will be using Google App Engine and JQuery, which are by far the easiest and most effective tools to use at the moment.
This means that your app will be hosted on Google’s servers for the best runtime for your users, and will use JQuery to include beautifully functional application-like features, with no knowledge of Javascript needed. This is a tutorial to harness the potential of new technologies in order to build your ideas, without the hassle of learning difficult programming languages, or splashing out on professional developers or hosting.
Google App Engine
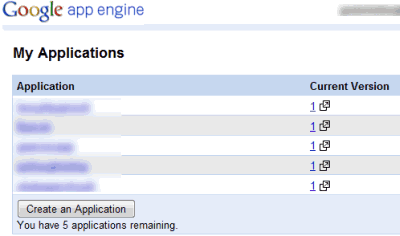
First of all, you’re going to need a Google Account. I assume most people reading this have one already because of the fantastic services Google offer (GMail, etc.). If you have a Google Account, then go to appspot.com. If you don’t, you can sign up for one there – the benefits of a Google Account are enormous. Once you are at appspot.com, sign in with your account username and password. Click “Create an Application“.
Choose an Application Identifier, for your app, but remember that it doesn’t have to end up being the name of your app by any means. For instance, for my first app I used my name, and the service I ended up making doesn’t even belong to me any more and is being served on another domain. The Application Title is more important, so think about what your app is going to be about. Again, it isn’t critical for this name to be final. When you’re done with this, click “save”.
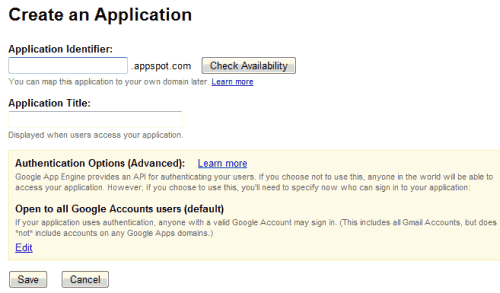
For this demonstration, I’m actually going to be creating a new application myself. I’ve called it “Get Your Kicks on Route 66”, and the Identifier I’ve used is “stringsthattie.appspot.com”. See, the identifiers that I’ve used are quite trivial! This is because I know I can always move my application to another domain. Click “save” to proceed. Well done! You’ve just registered an application with Google Apps. Now let’s take this a step further.

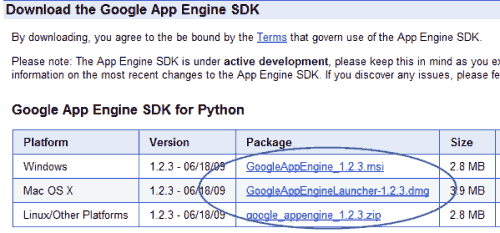
Now you should download the Google App Engine toolkit (it’s called an SDK – standard development kit), as well as Python. Now, don’t worry – it may sound intimidating, but I’m going to guide you very smoothly through this, don’t worry about a thing. You can first download Google App Engine SDK. Choose one of the three options, as described in the image below. Make sure you remember where you install the SDK, and do so in an accessible place.
Get Python
Now, download Python, from www.python.org/download
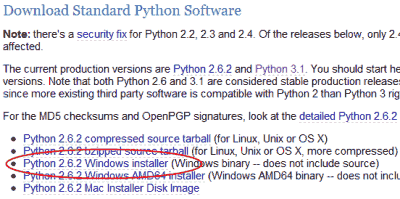
Install Python (very self-explanatory). Now, open the folder where you’ve saved the Google App Engine SDK. Make a new folder there, and name it something short that describes your application (it can be anything, mine is “string”). Once you’ve done that, make three new notes in a simple application like notepad (I’m going to be using Windows Notepad, but I would also suggest that you download Notepad++ for future developments). Save the first one as “app.yaml“, the second as “main.py“, and the third as “index.html“. Make sure they don’t have “.txt” at the end of the file name – to avoid this, when saving set ‘Save As Type’ to ‘All Files‘.

Now, put the following code into the main.py file:
from google.appengine.ext import webapp
from google.appengine.ext.webapp.util import run_wsgi_app
from google.appengine.ext.webapp import template
from google.appengine.ext import db
import cgi
import os
class Table (db.Model):
    element = db.StringProperty()
class Index(webapp.RequestHandler):
    def get(self):
	template_values = {}
        path = os.path.join(os.path.dirname(__file__), 'index.html')
        self.response.out.write(template.render(path, template_values))
application = webapp.WSGIApplication([('/', Index)],
                                     debug=True)
def main():
  run_wsgi_app(application)
if __name__ == "__main__":
  main()
If you don’t understand any of that, DON’T WORRY, it’s perfectly normal ;) I’m writing this for you. For those of you who do understand bits of it, or even all of it, you will be able to leverage more of Google App Engine’s features later on.
In the app.yaml file, put this next piece of coding, but replace [your app] with your app name:
application: [your app]
version: 1
runtime: python
api_version: 1
handlers:
- url: /.*
  script: main.py
In the index.html file, put this:
<html>
<head>
<style type="text/css">
h1, h2, h3 {
  font-family: Georgia, "Times New Roman", Times, serif;
  font-weight: normal;
  color: #006EA6;
  }
h1 {
  letter-spacing: -1px;
  font-size: 35px;
  }
h2 {
  font-size: 20px;
  }
</style>
</head>
<body>
<h1>My Website</h1>
<h2 id="info">Hi, this is my new website! It is hosted on Google App Engine servers, and makes use of complex AJAX APIs!</h2>
<button id="change">More Information</button>
<script type="text/javascript" src="http://ajax.googleapis.com/ajax/libs/jquery/1.3.2/jquery.js" />
<script type="text/javascript">
 $(document).ready(function(){
  $("#change").toggle(
   function () {
    $("#info").css({"color":"#8BCB2F"});
    $("#info").text("This is so exciting!");
   },
   function () {
    $("#info").css({"color":"#006EA6"});
    $("#info").text("Can't wait to do more!");
   }
  );
});
</script>
</body>
</html>
Upload to Google Servers
Now, if you open that index.html file in your browser, you should see an interesting little program working! Great. Now that you’ve saved all of these files, we can upload them onto Google’s servers, and test them out for real! For this, you need to open up command prompt, or Terminal if you’re using a Mac. Do you know where you’ve stored all your files for your website? For me, it’s at, “D:GraemeWork – FunPythonGoogle Appstring“. So the first thing I’m going to type into my command prompt is “d:”, and then hit enter.

Now I’m on the D-drive, so I’ll type in cd “D:GraemeWork – FunPythonGoogle App” and press enter. This is one folder short of where my files are saved, and should be where the Google App Engine SDK is (if you listened to me earlier). Right, so all we have to do now is type in “appcfg.py update [your app’s folder]” – replace [your app’s folder] with the name of the folder that contains your website’s files. For me, I will type “appcfg.py update string”. Press enter. The prompt will ask you for your Google Account email address and password (for me that’s ,,, no not so fast!
If you’ve done everything correctly, a few lines will come up explaining that your application is uploading itself. Nice and easy! Mine has just finished loading, so I’m going to check it out at “http://stringsthattie.appspot.com”.
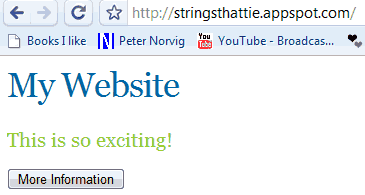
Okay, that concludes our introductory lesson on writing web applications! I would suggest that you work on your index.html file, and play around with the JQuery I have done for you there. There are many JQuery tutorials on the internet. Learning enough Python to continue making your application better is very easy, and there are many tutorials, some of which are on my blog. Purchasing your own domain will mean that you can run your web application from the web address that you want. Google will still run your app from their servers, so this is very convenient.
This post was written by Graeme Alan, a programmer with expertise in Python and Java, as well as many common web languages. While learning the Google App Engine platform, he created his own blogging system, which he frequently updates at PyThoughts.com. You can also share your tips and write a guest article on QOT.