We have switched over from WP-SuperCache to QuickCache as the primary WordPress caching plugin for our site. We have used WP-SuperCache for over 5 years now and it is one of the best caching plugins out there. But then Quick Cache turned out to be a great caching plugin too
Remove WP-Super Cache
However, since the release of the latest version, there were some buggy issues and we were unable to delete the cache. It was getting tedious to FTP inside the server and manually delete the cache. Then repeatedly reinstalling the plugin, some strange kind of 403 errors occured. It was time to try a new caching plugin…
Kindly note these are isolated issues affecting only our server and WP-Supercache is undoubtedly an excellent plugin, which is not only the most popular plugin, but also highly recommended.
WordPress Caching
A caching plugin is the single most important plugin to add to WordPress blogs, as it stores php pages as html files and minimizes server load. It will keep your site online even when the server is down, and will help your website survive unexpected traffic spikes even on shared hosting.
I wanted to use W3-Totalcache and combine it with a CDN service like MaxCDN (or Amazon Cloudfront which we already use to cache some static files), but since the plugin is so feature rich and so powerful, the controls and options in the plugin are too overwhelming. Meanwhile, the forums are filled with growing popularity of QuickCache. So I decided to give QuickCache a try…
Install Quick Cache
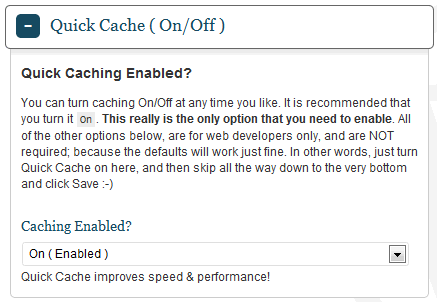
Firstly QuickCache works out of the box. Simply activate and turn on caching and you dont need to edit any setting unless you want to really customise caching options, which we didnt need, not will most other users. So basically it was simple to start and get working instantly.

At most you might want to increase the caching time from default 3600 (1 hour) to 36000 (10 hours) or higher if your content does not change too frequently. Also note that QuickCache does not cache pages for admin and known users by default, and also refreshes the pages after people post comments. So you need to actually logout to see it is working. Another good option is it will refresh only the single post after edits, and not the whole cache ( for which there is a quick clear cache button on top).
If you FTP inside the server, the files in the /cache folder are also stored differently. While Supercache used to replicate your entire site structure in the folder, Quick Cache stores them as MD5 hash files, which checks with your Salt in a complex interaction before serving cached files.
Quick Cache Gzip Compression
Note that unlike Wp-Supercache, QuickCache has no option to enable gzip compression of your webpages. Gzip compression is a good idea as it helps to compress pages and deliver them to modern browsers, which helps to speed up you site load times and deliver a faster and better user experience.
Quickcache FAQ does suggest 2 ways to activate gzip compression manually. One is by editing your .htaccess file using mod_deflate, but that did not work for our site. The other alternative did work as Knownhost has installed zlib on our server. Simple create a blank notepad file, add zlib compression
zlib.output_compression = on
and save as php.ini and upload to your server root folder. It works and pages do get gzip compressed. Since it does not output ‘gzip on’ comment in the html code, you can test it using any HTTP compression test tool.
So basically we are very happy with QuickCache as of now and it is caching our WordPress blog error free and it is also highly recommended. Are you using Quick Cache and have some tips to share?