How to Create a Personal Website with Bluehost AI Builder (Step by Step)
You can now create a personal website by describing yourself in a few sentences: no code, no theme, no designer. In this guide and Bluehost AI Builder review, we build a one-page personal portfolio from scratch with AI, show every step, and give you a prompt you can copy to make your own.
A personal website gives you your own address for a CV, email signature or business card, puts your photo, bio, work samples and contact form in one place, and stays yours even if a social network changes its rules. Most people never build one because design, hosting and writing about yourself feel like too much work. That is exactly what an AI builder takes off your hands: you describe yourself, and it handles the layout, the first draft of the words and the hosting.
Disclosure: This is a sponsored post. Bluehost paid QuickOnlineTips to write about Bluehost AI Builder, and we may earn a commission if you sign up through our links. The opinions and the verdict are our own.
Quick answer: Sign up at Bluehost AI Builder ($0 to start, no credit card), describe who you are and what you do in one prompt, attach your photo and work samples, click Build, then check the page and click Publish. Our one-page portfolio was ready in about 3 to 4 minutes and used 1 of the 5 free daily credits. You can build and share it free. To put it on your own name, like yourname.com, and let Google find it, you need a paid plan (paid plans from $20/mo).
Table of Contents
How to create a personal website with Bluehost AI Builder
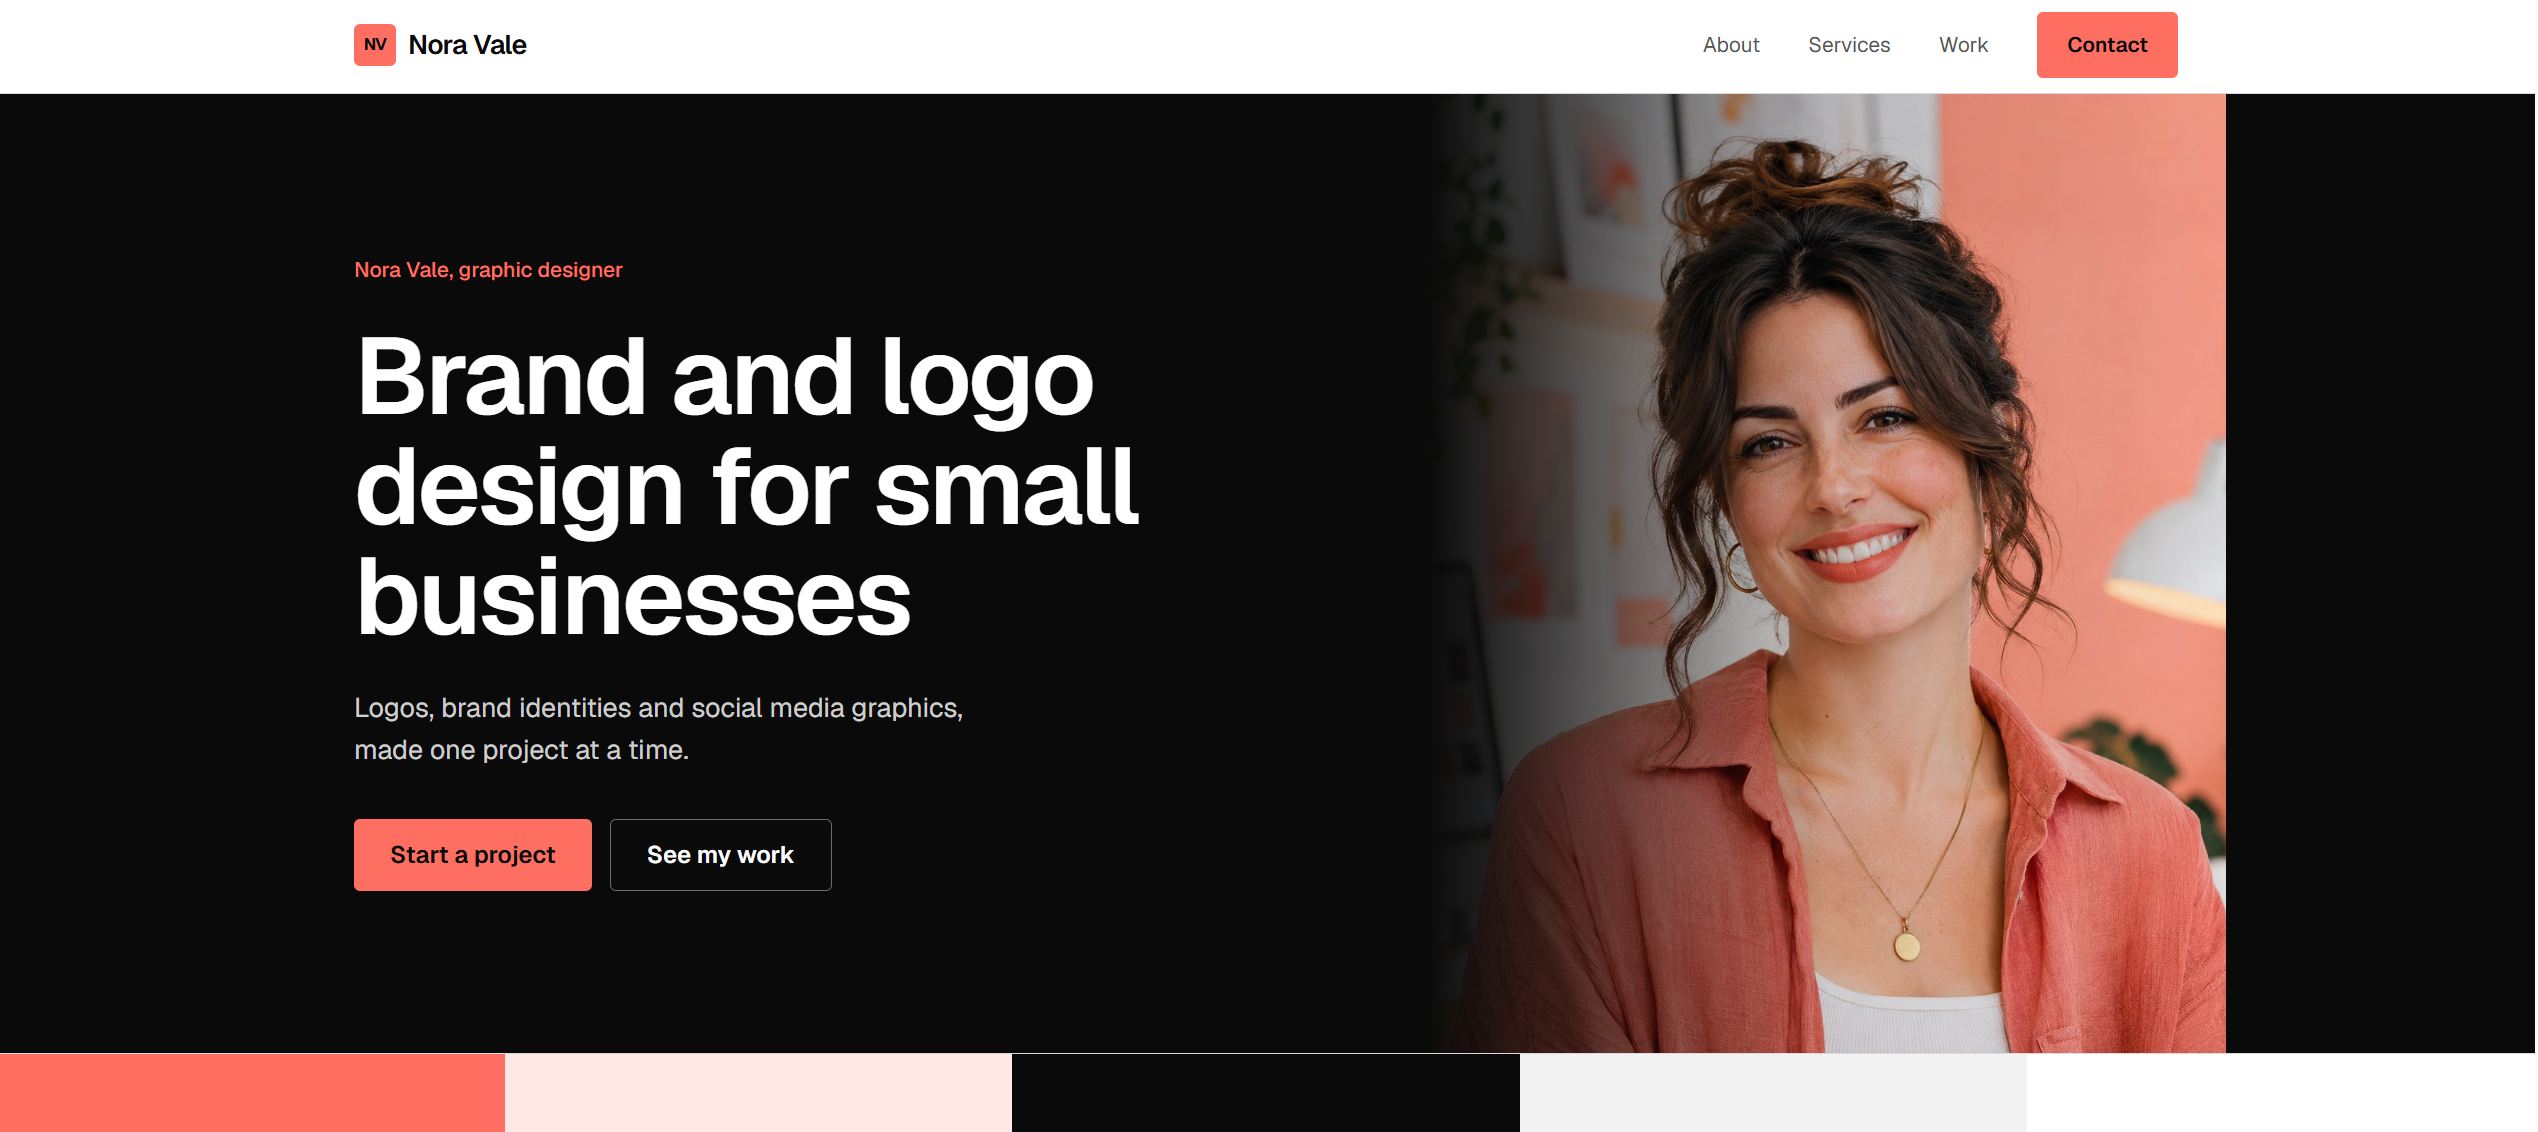
For this guide we built a one-page portfolio for Nora Vale, a freelance graphic designer. Nora is a fictional sample and her photo and work samples are AI-generated, so you can see exactly what the builder makes from a typical brief. Here is exactly what we did, step by step.
Step 1: Sign up free
Open Bluehost AI Builder and create an account with your email. The Free plan has no end date and needs no card, and it gives you 5 credits a day.
Step 2: Create your images and write your prompt
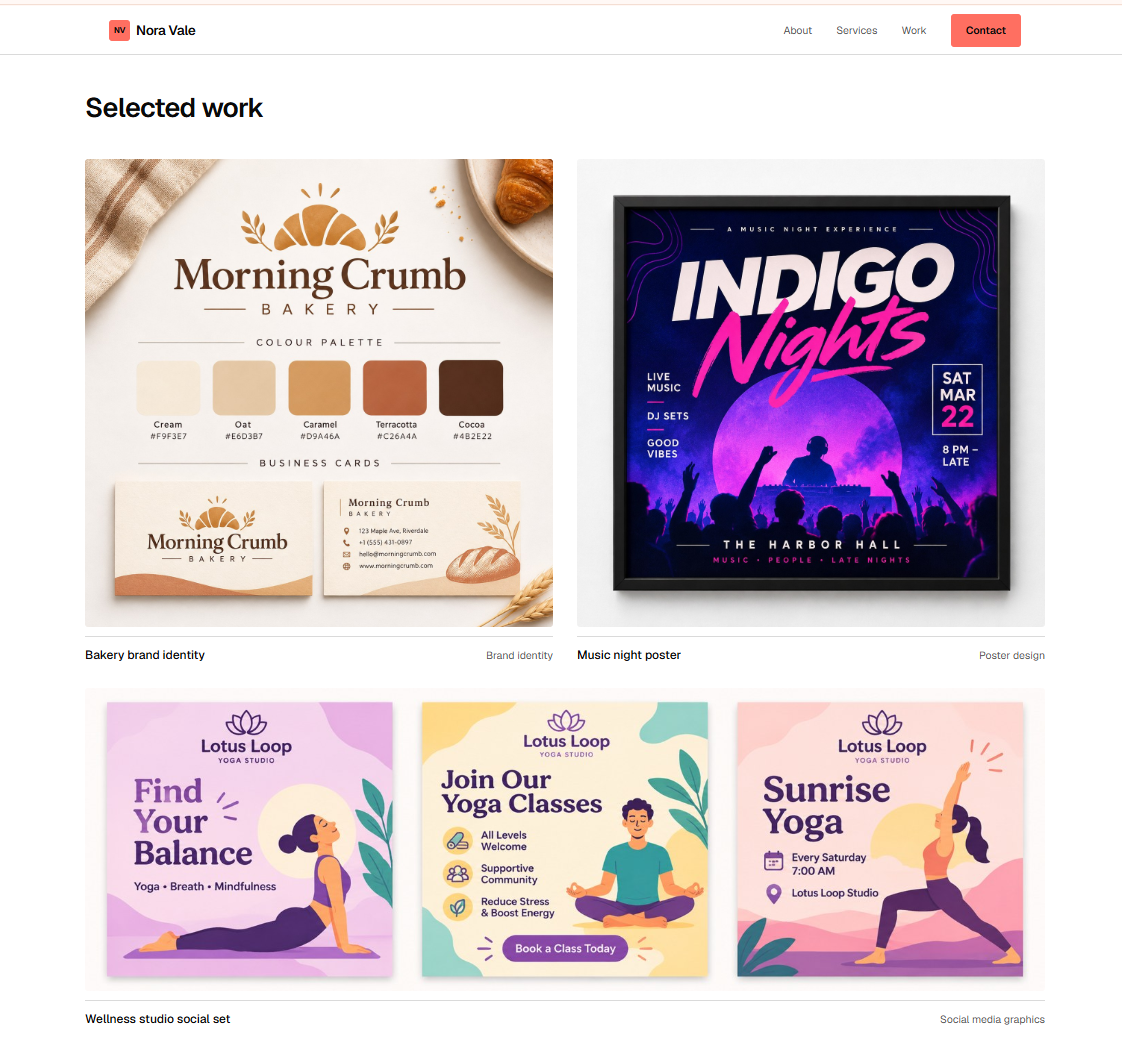
Before opening the builder, prepare two things. First, your pictures: we made four images for Nora, a portrait for the header and three work samples for the portfolio (a bakery brand identity, a music night poster and a set of yoga studio social posts). The builder takes PNG, JPG or WebP images up to 5 MB each.

Second, one detailed prompt that describes the whole page, because every change after the first message uses a credit. This is the exact prompt we wrote:
Build a one-page portfolio website for Nora Vale, a freelance graphic designer who creates logos, brand identities and social media graphics for small businesses. Include: a header with my photo and the headline “Brand and logo design for small businesses”; a short About section; my services (logo design, brand identity, social media graphics); a portfolio section with three project images; links to Instagram, Behance and LinkedIn; and a contact form. Style: clean, modern and creative, white background with coral as the accent colour. Make it look great on phones. Use the attached photo in the header and the three attached project images in the portfolio. Do not add testimonials, reviews, prices, client names or any real brand names.
The last line matters: asking the AI not to invent testimonials, prices or client names keeps your page honest. To make your own, copy this template and fill in your details:
Build a one-page personal website for [your name], a [your job or role] in [city or “working online”]. Include: a header with my photo and the headline “[your headline]”; a short About section; my top skills or services; [2-3] work samples or achievements; links to my [LinkedIn / Instagram / GitHub]; and a contact form. Style: [clean and professional / bright and creative], with [colour] as the main colour. Make it look great on phones. Use the attached photo in the header.
Step 3: Paste the prompt and add your images
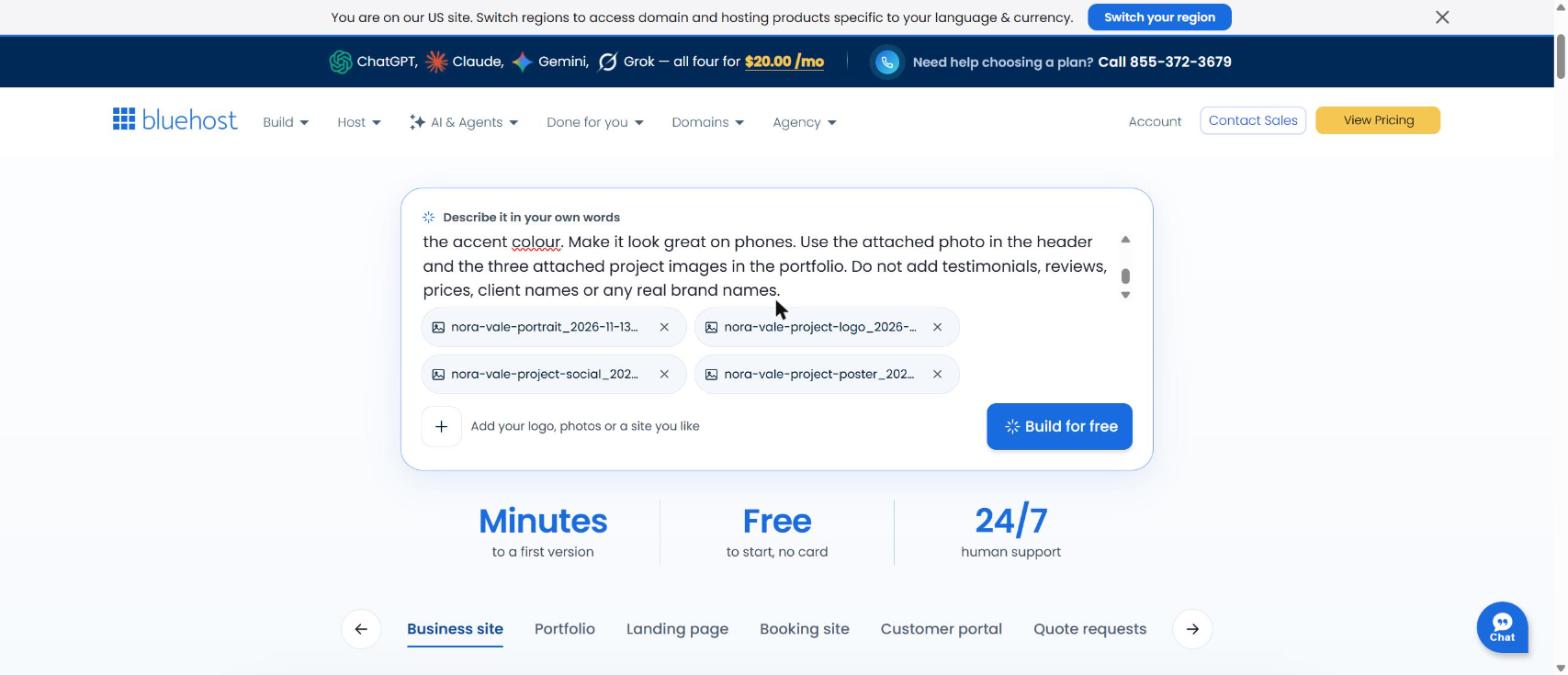
On the Bluehost AI Builder page, paste your prompt into the “Describe it in your own words” box.
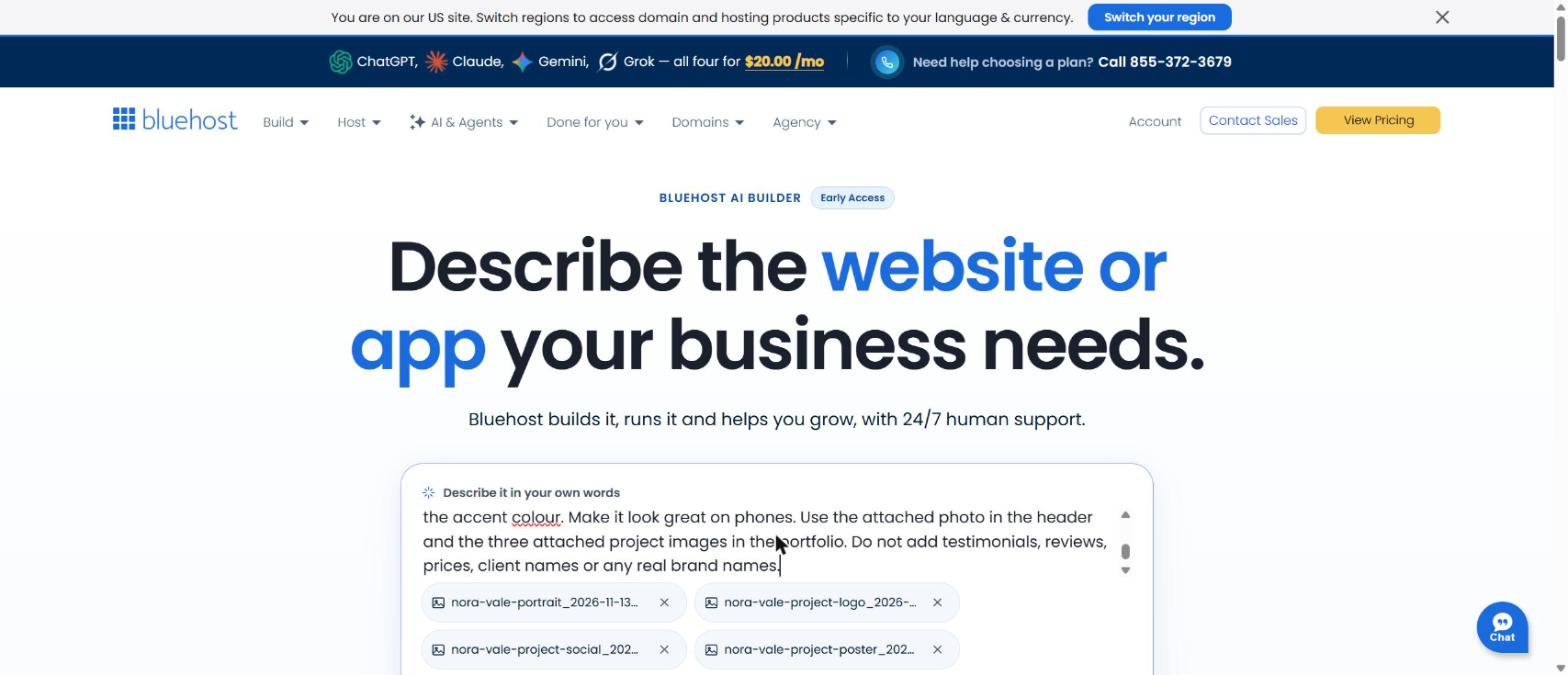
Then click the + button under the box (“Add your logo, photos or a site you like”) and attach your images. Our four files appeared as small tags under the prompt. Click Build for free.
Step 4: Watch it build
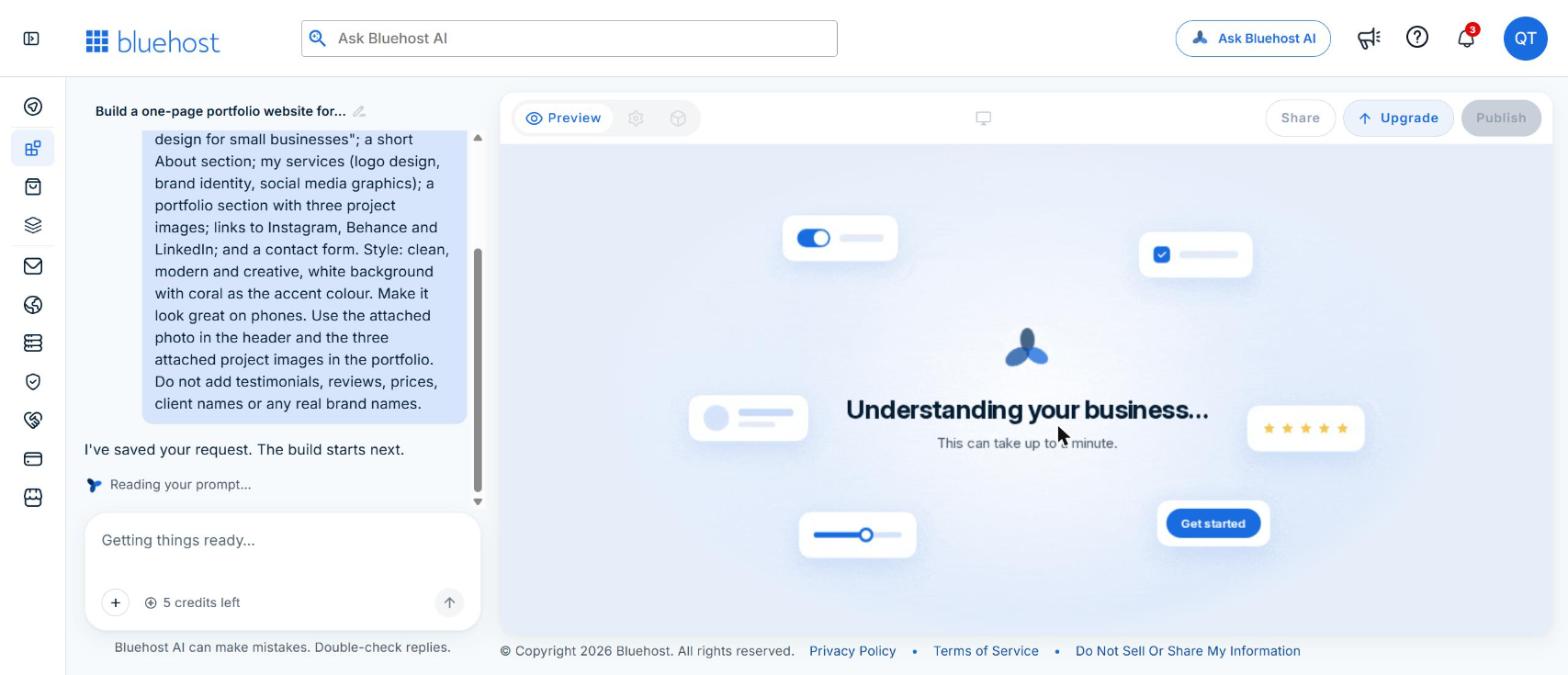
The editor opens with your prompt in the chat on the left. First it shows “Understanding your business”, which can take up to a minute. The credit counter under the chat box showed 5 credits left at this point.
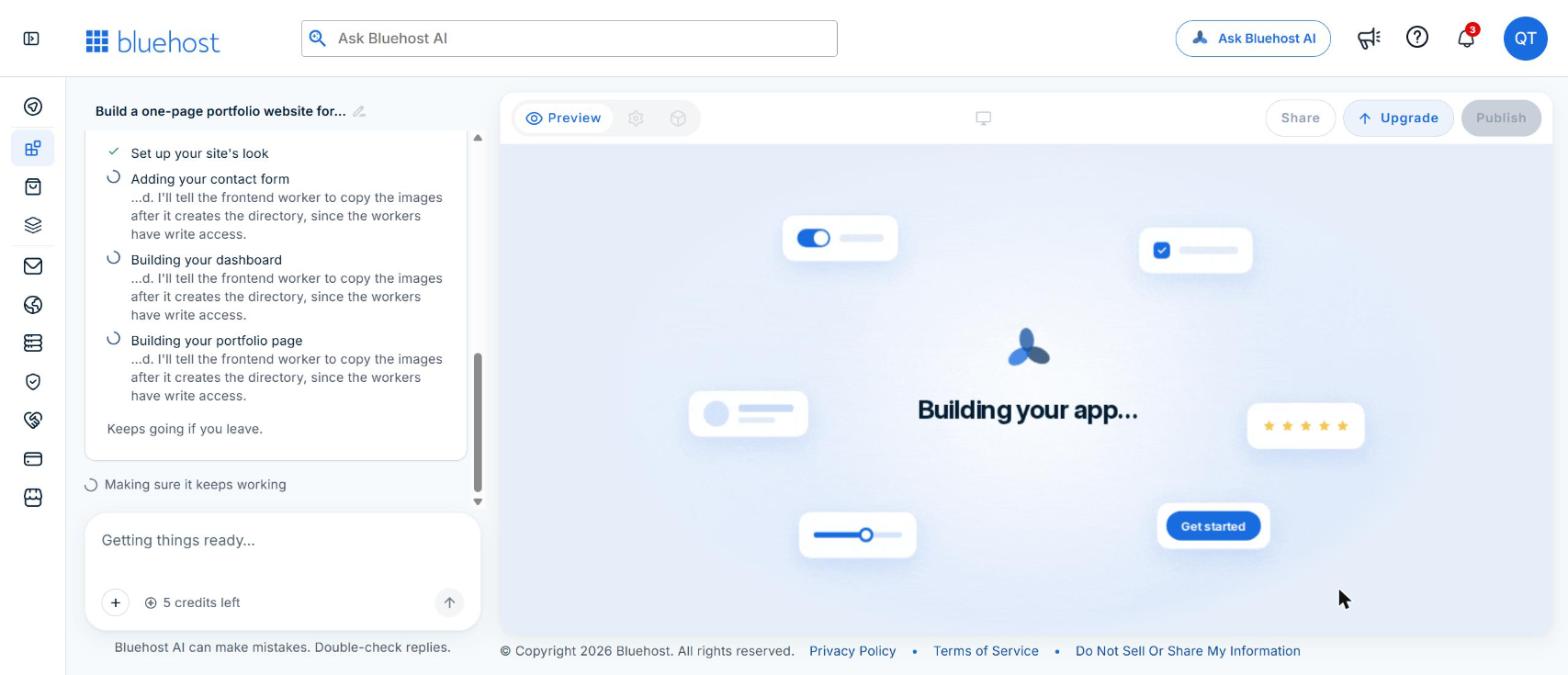
Then the chat lists what the AI is working on: setting up the site’s look, adding the contact form and building the portfolio page. It notes that the build keeps going if you leave the page.
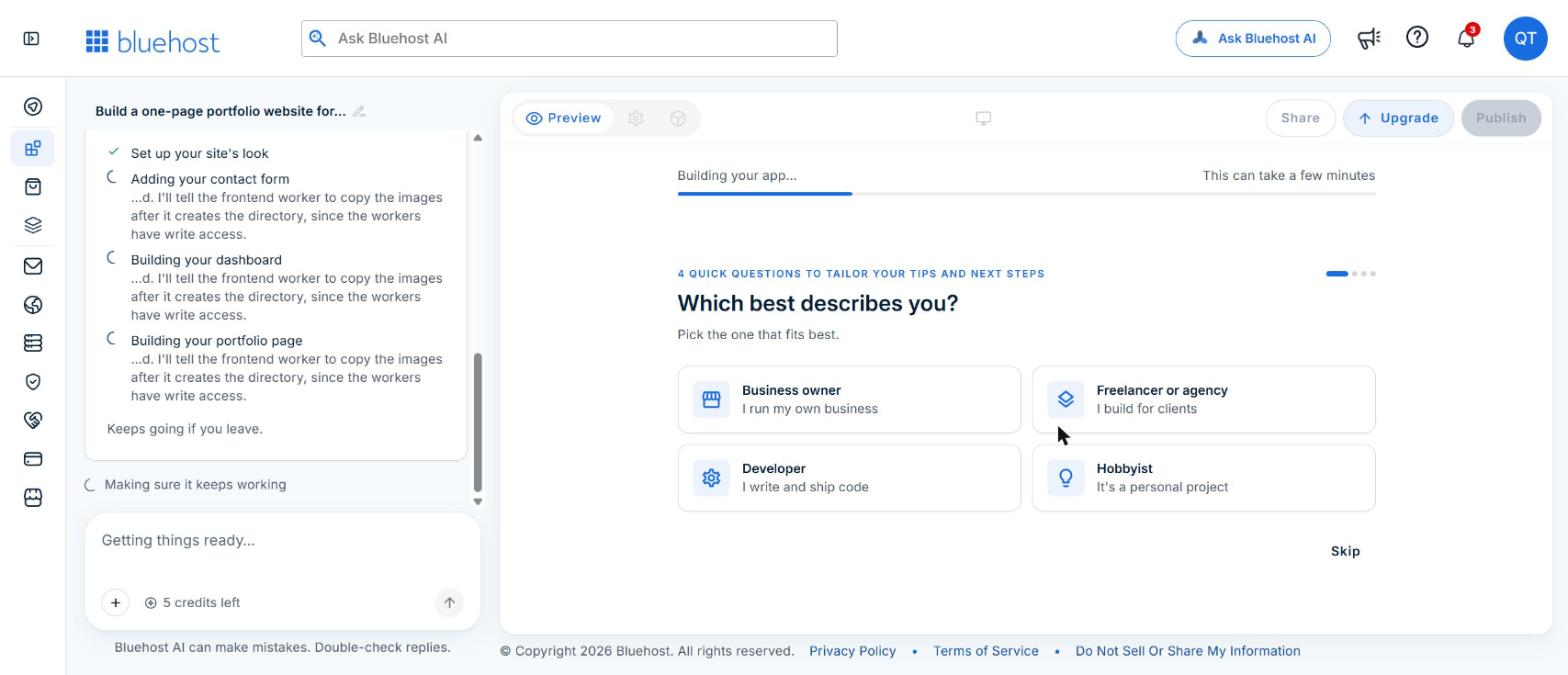
While it builds, the preview area shows four optional questions “to tailor your tips and next steps”: which best describes you, your industry, how many people work at your business and what you want to focus on. They don’t change the site, and each one has a Skip button. We answered them anyway (Freelancer or agency, Creative and media, Just me, Get my business online and Grow website traffic).
Step 5: Your site is ready
About 3 to 4 minutes after we clicked Build, a green “Your app is ready” bar appeared. In the chat, the AI summed up what it had made and noted that the social links stay hidden until we add our profile addresses. The first build used 1 credit, leaving 4.
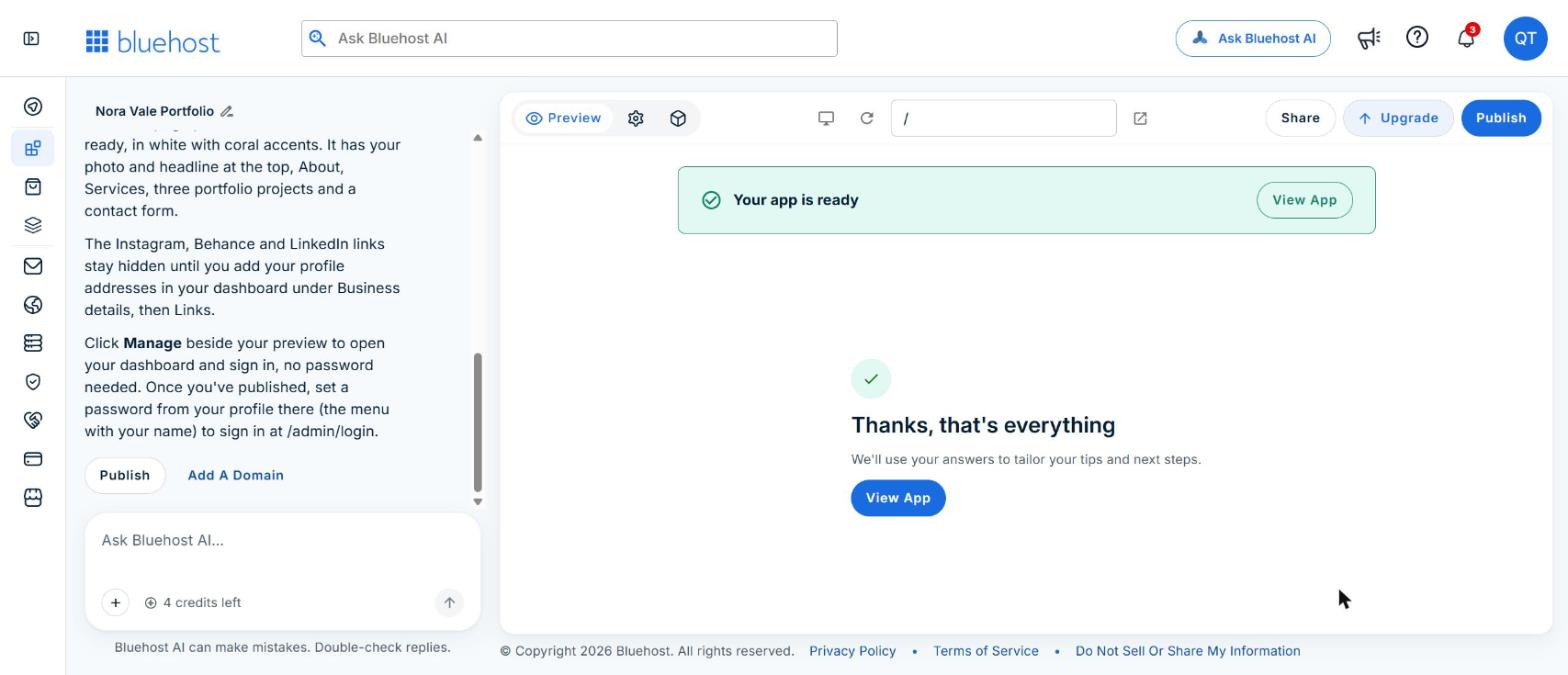
Click View App to see the site in the preview, next to the chat.
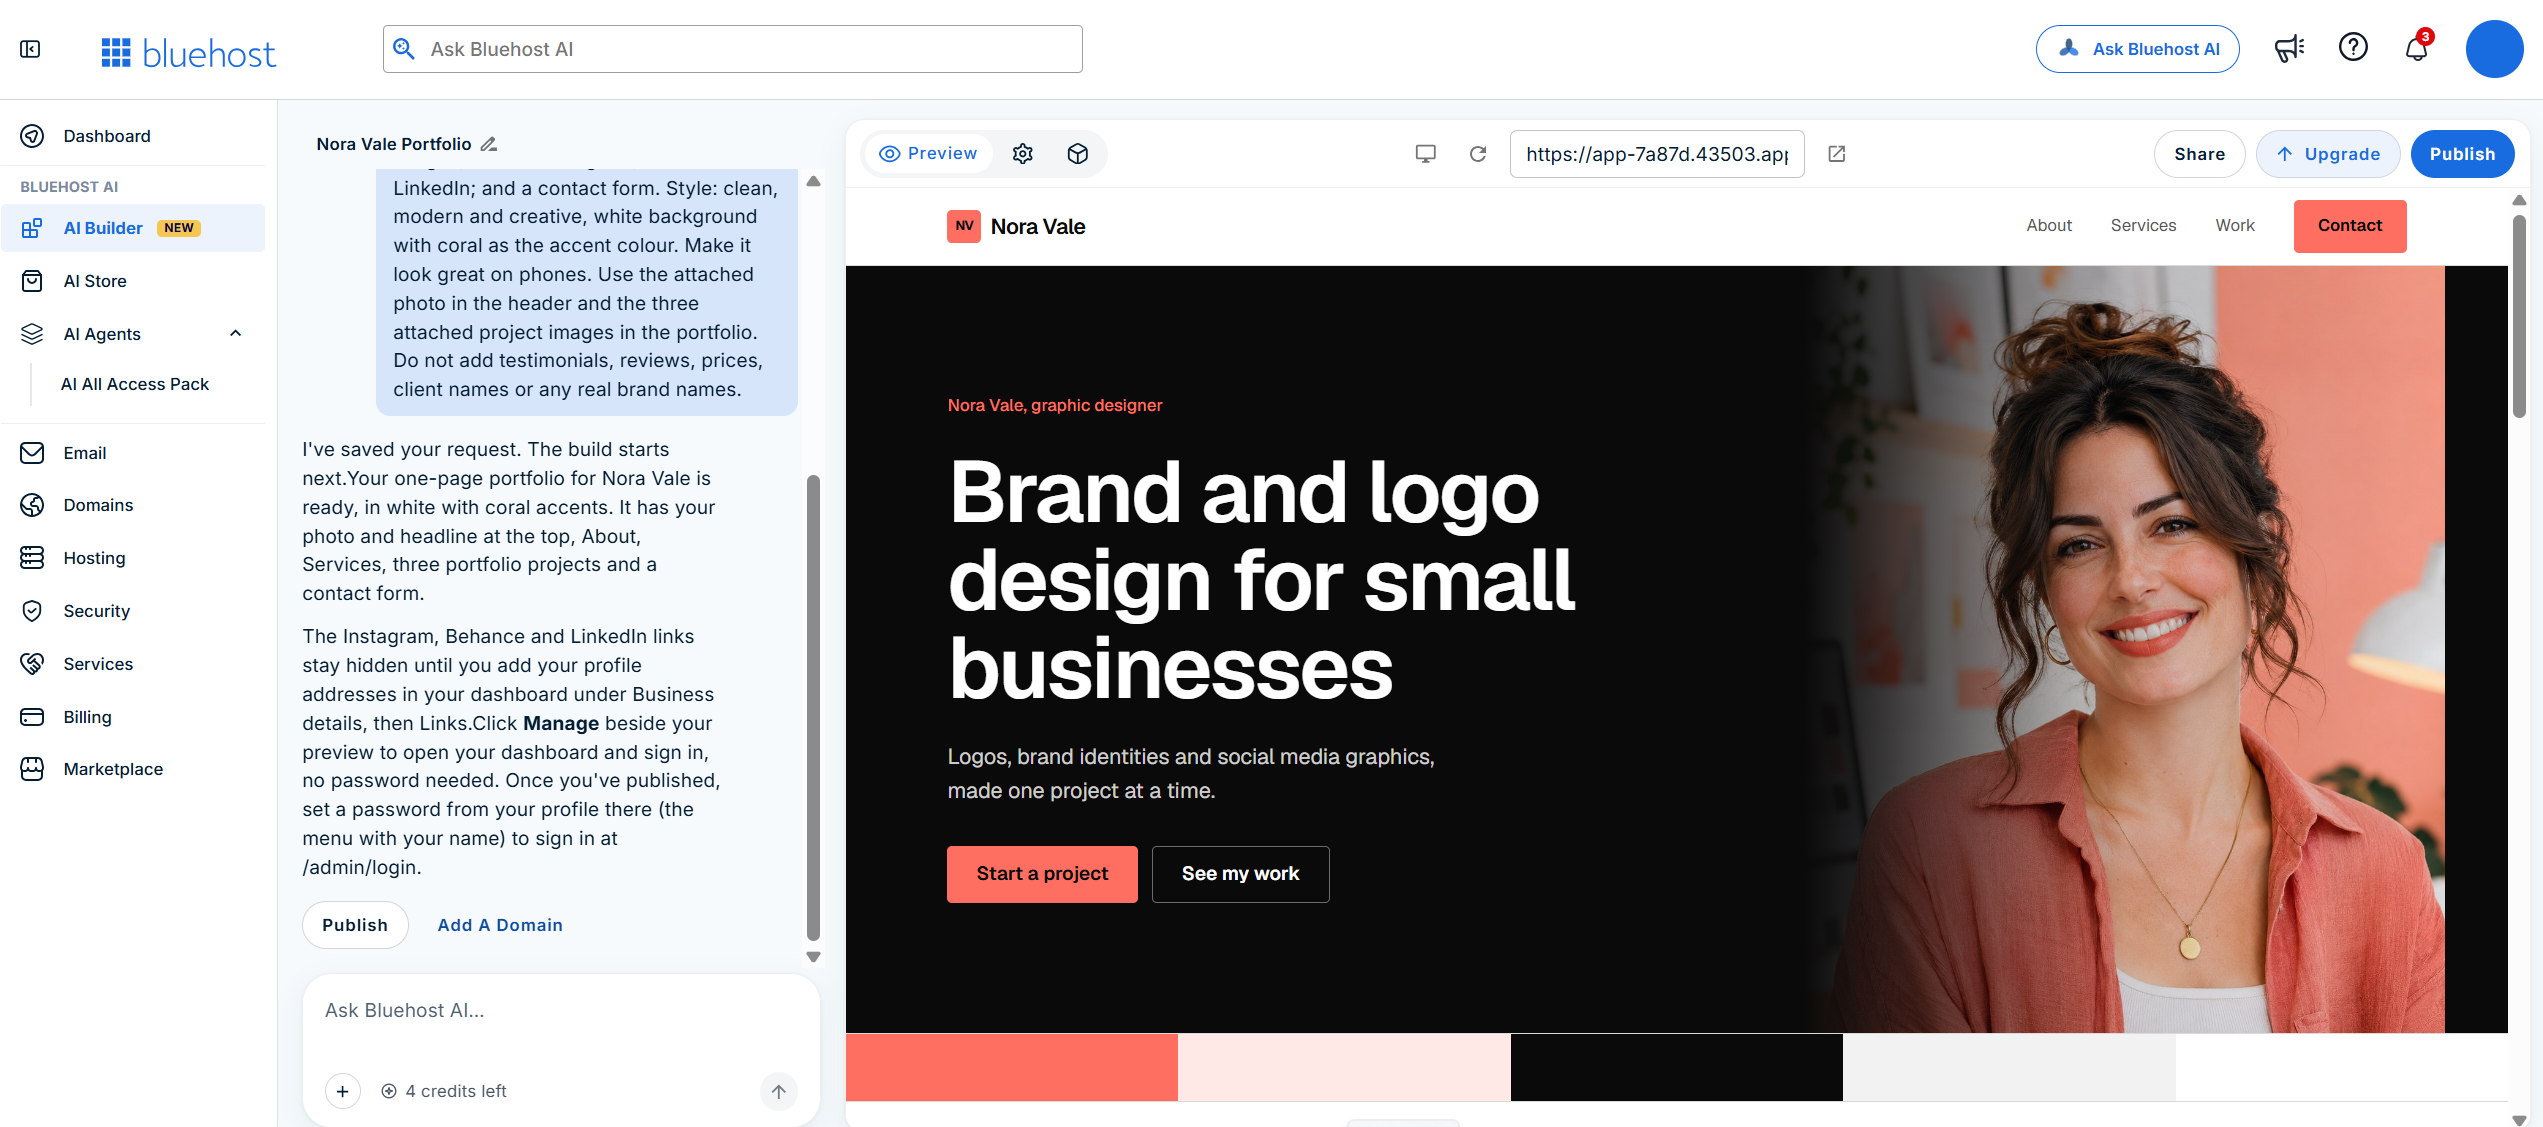
Step 6: Check every section
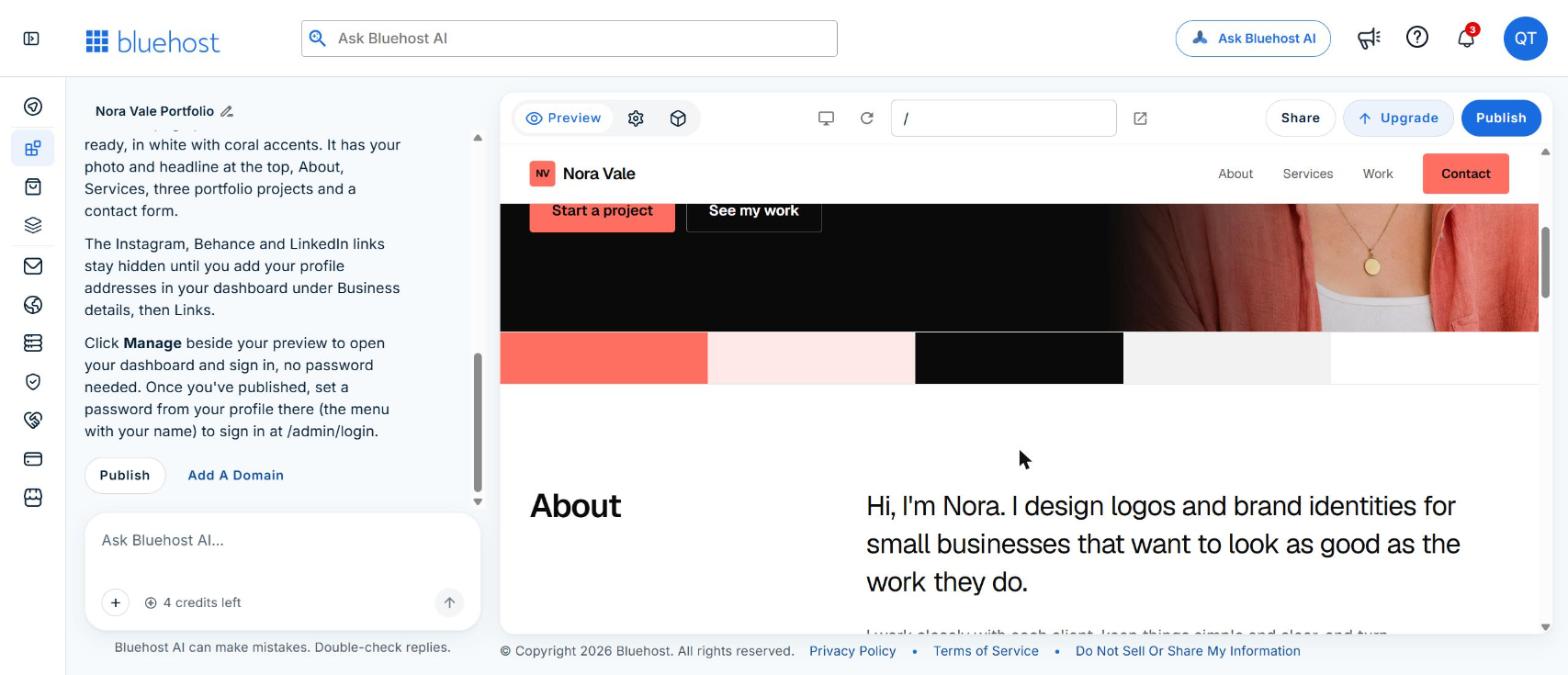
Scroll through the preview and compare it with your brief. Ours followed it closely. The About section turned our one-line brief into a short, friendly intro:
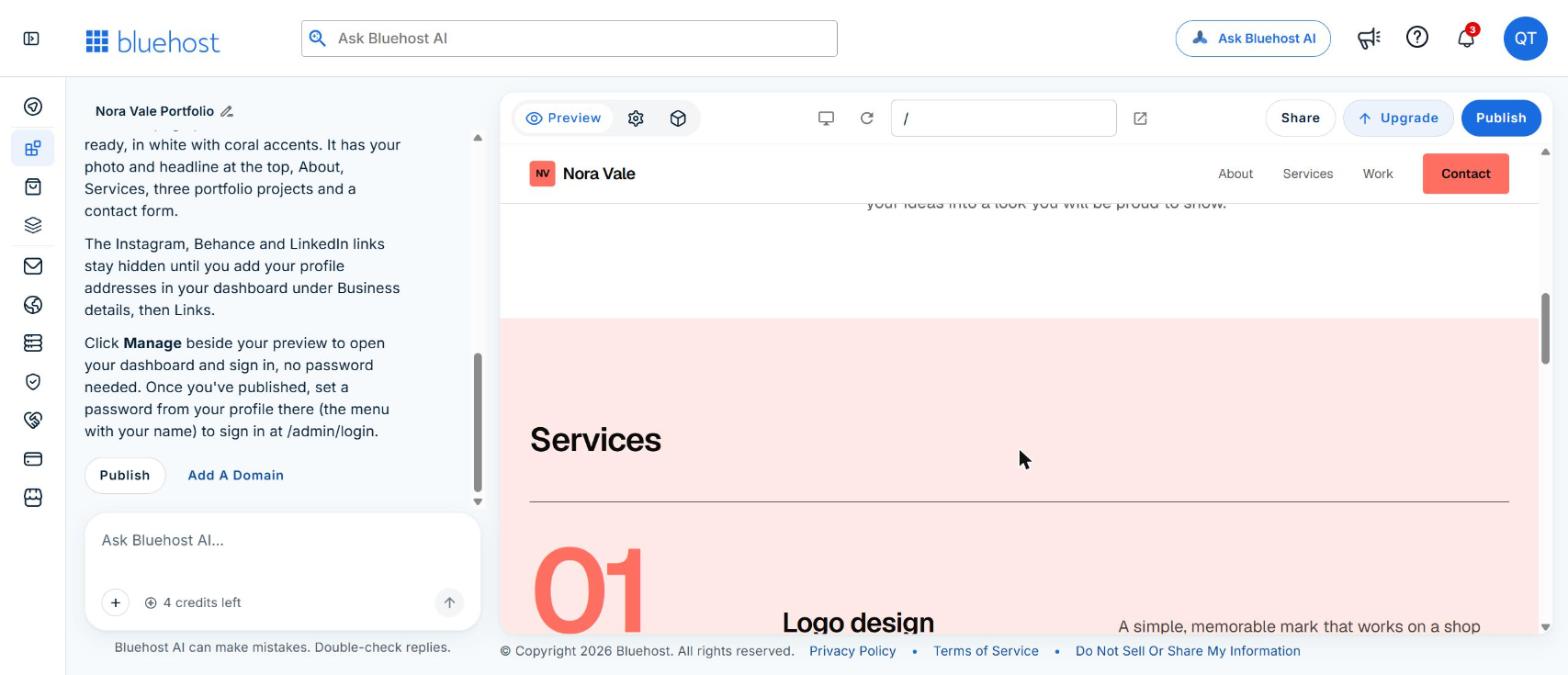
The three services became a clean numbered list, each with a one-line description:
Our three project images went into a “Selected work” grid, each with a title and a label:
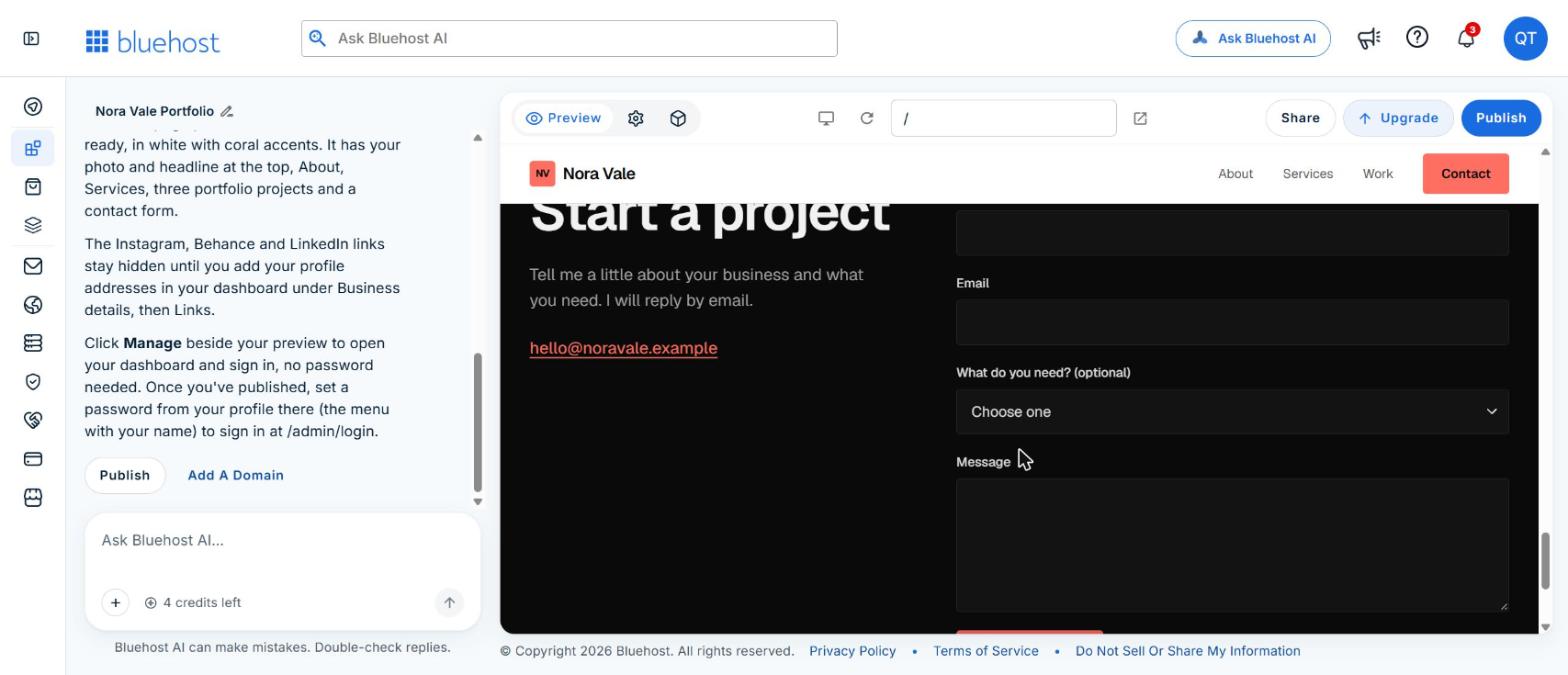
At the bottom is a “Start a project” contact form with name, email, a “What do you need?” dropdown and a message box, plus a placeholder email address you should replace with your own.
If something needs changing, ask in the chat, one clear change per message, for example “Shorten the About section to three sentences” or “Use a larger photo”. Each change uses a credit, and there is no undo button: to go back, ask the builder to revert the last change, which also uses a credit. Our first version needed no changes.
Step 7: Check it on a phone
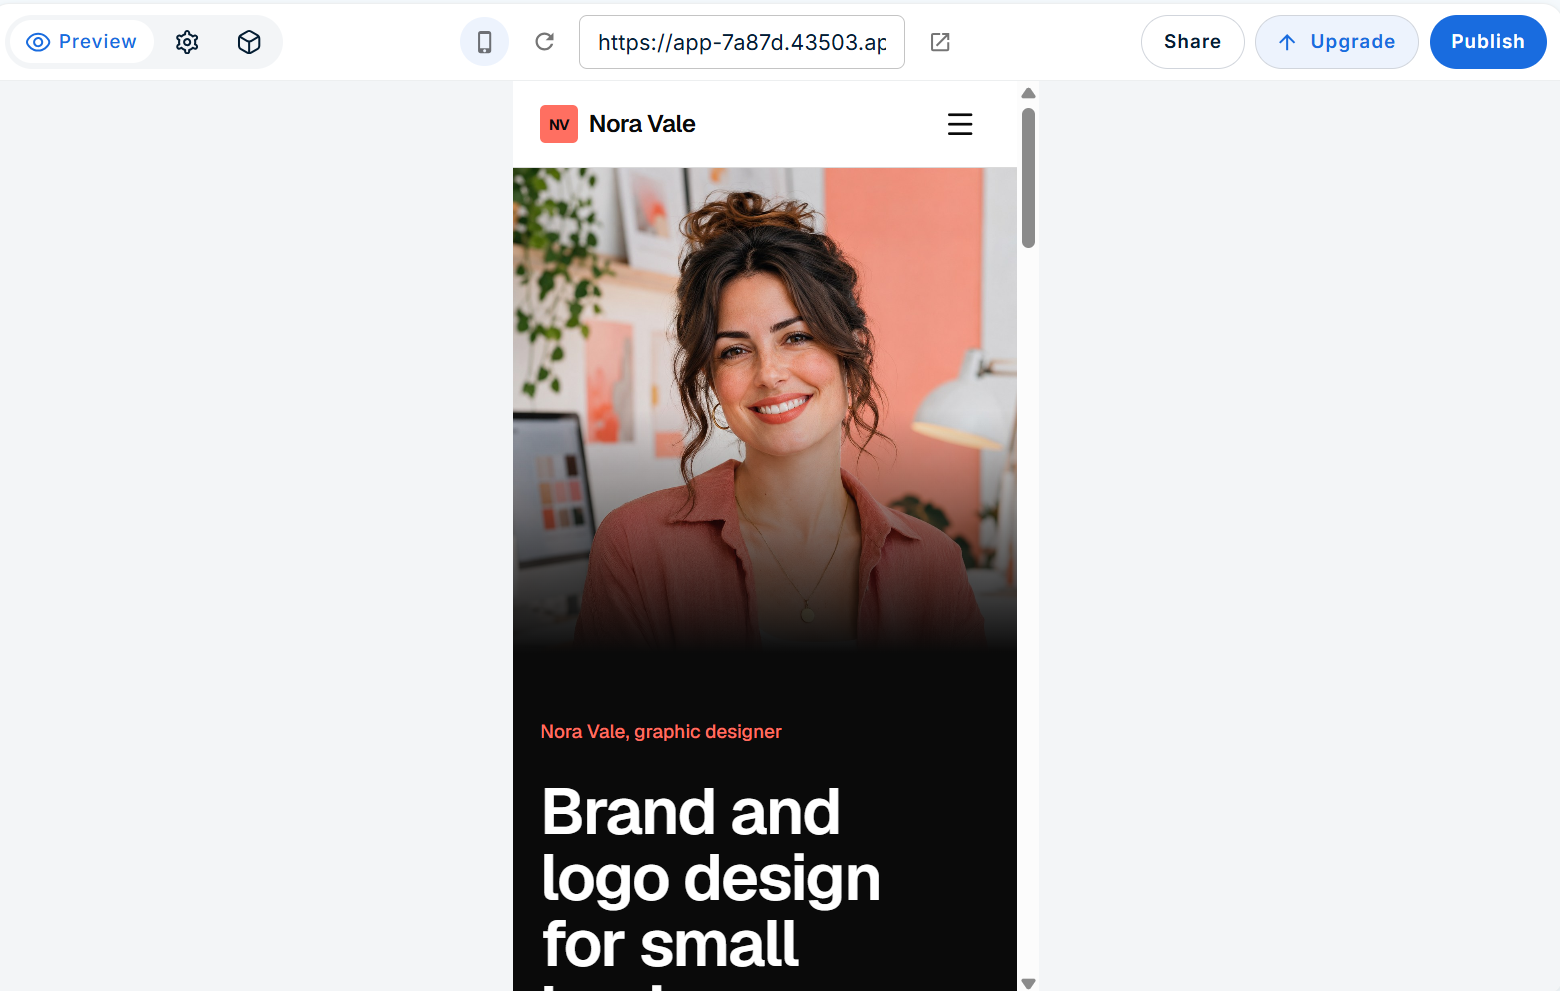
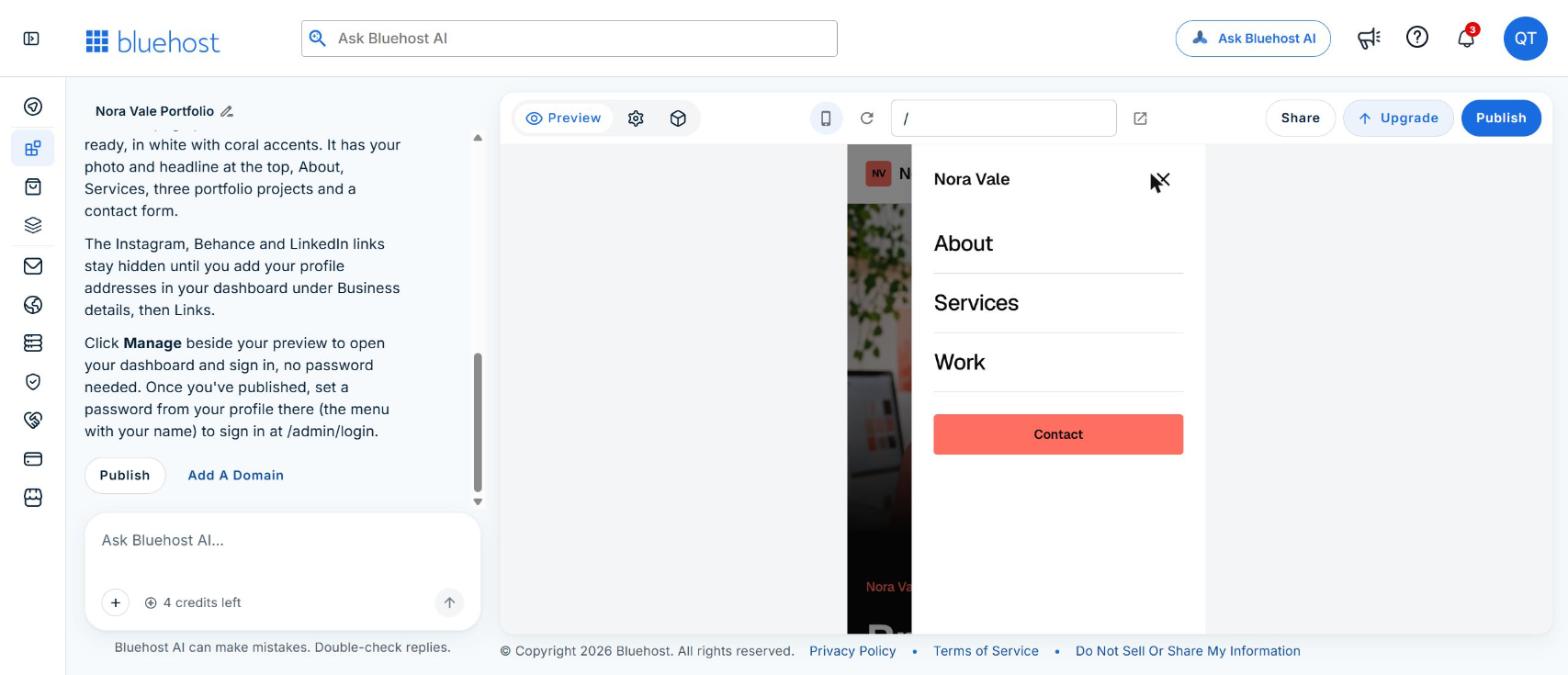
Click the device button above the preview to switch to phone size. On our site the layout stacked neatly, the photo moved above the headline, and the menu folded into a button that opens a full-screen menu.
Step 8: Add your social links and contact details
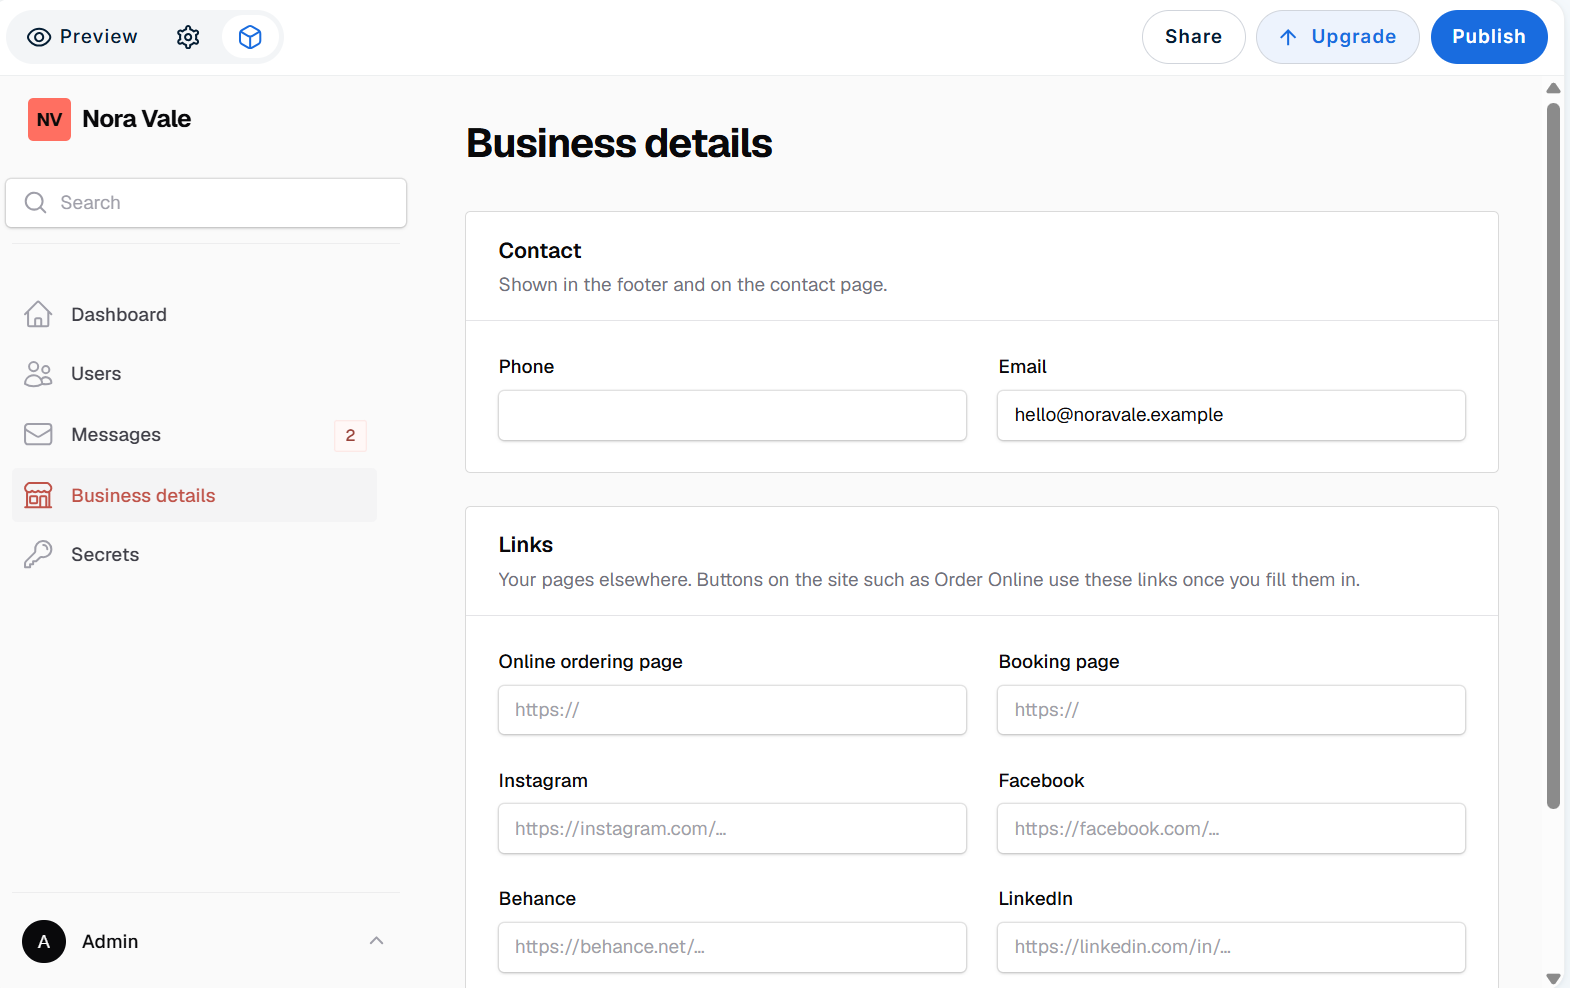
Click Manage beside the preview to open the site dashboard, then go to Business details. Add your real email and your Instagram, LinkedIn or other profile links; the AI told us the social links stay hidden on the site until you fill these in.
Step 9: Publish for free
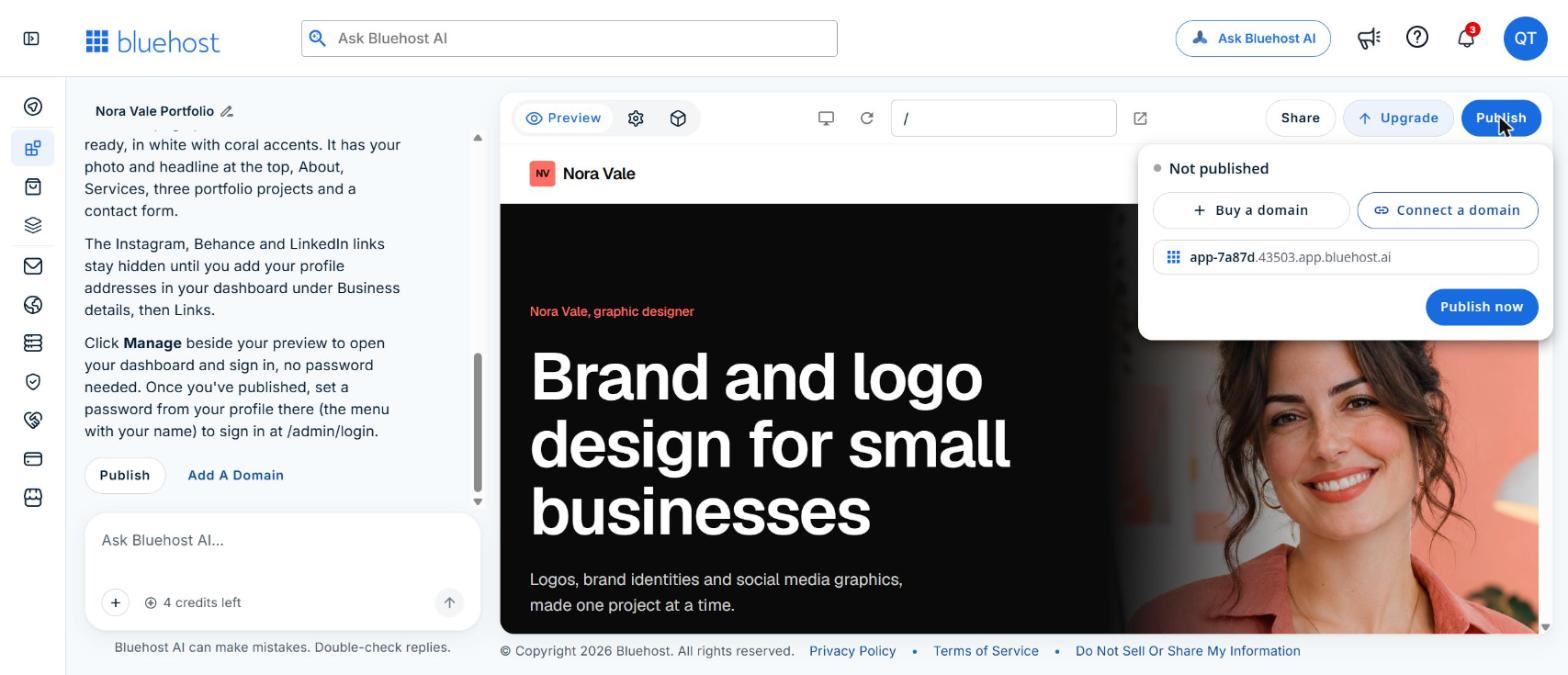
Click Publish at the top right. The panel shows your free .app.bluehost.ai address and options to buy or connect a domain. Click Publish now.
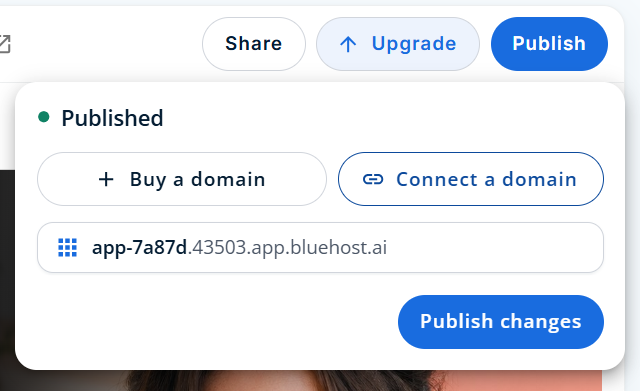
Publishing took about two minutes and used no credits: we still had 4 left. The panel then shows “Published” with your live free address. From the same panel you can buy a domain or connect a domain you already own, and after any later edit you click Publish changes to update the live site. Open the live page, click every link and send yourself a test message through the contact form.
Step 10: Put it on your own name
The free address is fine for testing and sharing, but it is hidden from search engines and you can’t choose it. To use yourname.com, remove the Bluehost badge and let people find you on Google, upgrade to the Lite plan from inside the builder and connect a domain you own or buy a new one.
Bluehost AI Builder review: what we liked
- Fast from idea to live page. No theme, plugin or code: about 3 to 4 minutes and 1 credit for our first version.
- It follows a detailed brief. It used our exact headline, our photo and our three project images, and it respected the “no testimonials, no prices” instruction.
- It writes the first draft about you. You edit a headline and bio instead of facing a blank page.
- Changes are just messages. Changes stay in a private preview until you publish again.
- Mobile-ready by default. The phone layout worked without any extra request.
- Hosting and support included. Hosting never uses credits, and Bluehost offers 24/7 human support on every plan, including Free.
- A real free plan to build, test and publish before you pay anything.
Limits to know before you start
- Free pages aren’t on Google. The .app.bluehost.ai address is not indexed; you need a paid plan and your own domain for search.
- Credits. Every message that creates or changes the site uses 1 credit, failed builds too. The Free plan gives 5 a day, up to 30 a month. When credits run out, editing pauses but the page stays online.
- Social links need a second step. On our build they stayed hidden until the profile addresses are added in the dashboard.
- No code export. There is no source code access or FTP, so you can’t move the site to another host.
- No direct selling. Payments aren’t supported in AI Builder; Bluehost points sellers to its AI Store.
- Solo editing. You can share a view-only link but can’t invite others to edit.
AI Builder vs WordPress vs hiring a designer
| Bluehost AI Builder | WordPress (do it yourself) | Hiring a designer | |
|---|---|---|---|
| Skill needed | Describe yourself | Themes, plugins, settings | Write a clear brief |
| Time to a first version | Minutes | Hours to days | Days to weeks |
| Who writes the words | The AI drafts them | You | You or the designer |
| Making changes | Chat messages | Edit it yourself | Ask and wait |
| Full control and code | No code export | Full control | Depends on the deal |
| Best for | Personal pages, landing pages, small sites | Blogs and large sites | Custom brand work |
For a one-page personal website, describing yourself to an AI is simply faster than setting up WordPress or briefing a designer. WordPress is still the better home if you plan a growing blog with many posts, and a designer is worth it for a fully custom brand.
How much does it cost?
Bluehost AI Builder is $0 to start, no credit card, and paid plans from $20/mo.
| Plan | Price | Credits | Publish on |
|---|---|---|---|
| Free | $0 | 5 a day, up to 30 a month | Free .app.bluehost.ai address |
| Lite | $20/mo | 100 a month | Your own domain |
| Standard | $40/mo | 200 a month | Your own domain |
Every plan includes hosting and unlimited websites and apps. Credits expire after 30 days and don’t roll over; one-time top-ups are available. A domain bought through Bluehost is billed separately. For a single personal page, Free is enough to build and test, and Lite is the plan that puts it on your own name. See our web hosting deals for current hosting offers.
Our verdict
Bluehost AI Builder did what most people need from a personal website: from one detailed prompt and four of our own images, it produced a clean, phone-friendly portfolio page in a few minutes, kept to our headline, photos and instructions, and published it free in one click. The free plan is generous enough to build and test properly, as long as you put the whole brief in your first message. The trade-offs are real but fair for a one-page site: the free address isn’t on Google, social links need a quick trip to the dashboard, and you can’t export the code. If you want a simple personal or freelance page without learning WordPress or paying a designer, it is an easy recommendation; start free and upgrade only when you are ready to use your own domain.
Create your personal website free with Bluehost AI Builder →
FAQ
Can I create a personal website for free?
Yes. Bluehost AI Builder’s Free plan needs no credit card and has no end date. You can build and publish a personal page on a free .app.bluehost.ai address. A paid plan is needed for your own domain.
How long does it take?
Our one-page portfolio took about 3 to 4 minutes from clicking Build to a finished first version, and publishing took about two more minutes.
Will my personal website show up on Google?
Not on the free address, which is hidden from search engines. Connect your own domain on a paid plan so people can find you when they search your name.
Do I need to know how to code or design?
No. You describe yourself in plain language and ask for changes in the chat.
What should a personal website include?
A photo, a clear headline, a short bio, your skills or services, a few work samples, social links and a way to contact you.
Can I change my website later?
Yes. Ask for changes in the chat at any time, then publish again. Each change uses 1 credit.
$4.99Free when you subscribe
Get 100 tech terms explained in plain English
8-page PDF on AI, coding, slang and SEO + one tech email a week.
Sent by email. Unsubscribe anytime. See our privacy policy.